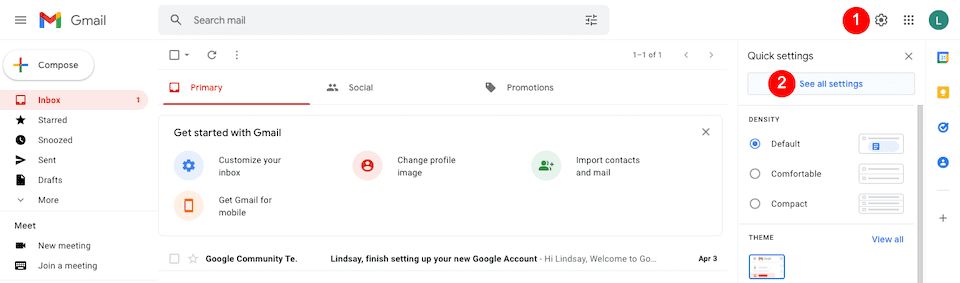
After signing into your Gmail account, hit the Gear icon on the top-right and select See All Settings.
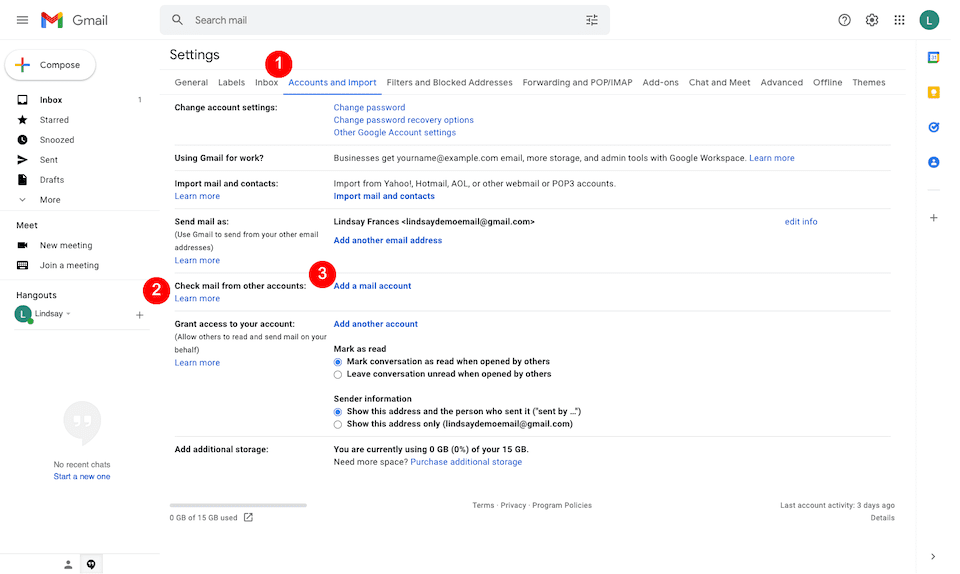
Select the Accounts and Import tab along the top. Under the Check Mail From Other Accounts section, click Add a Mail Account.
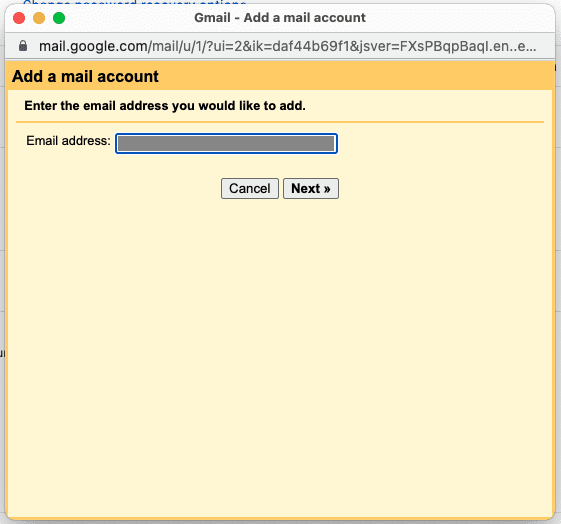
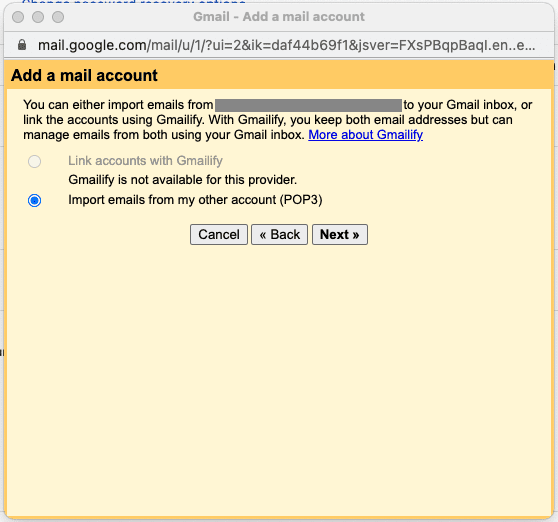
In the yellow pop-up box, enter your SiteGround email address and click Next.
On the next screen, the only option available for SiteGround users is Import Emails From My Other Account (POP3), which should already be selected. Click Next.
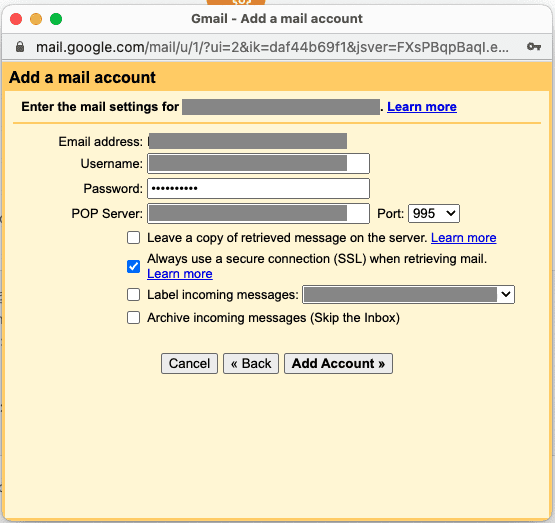
On the next screen, enter the following information:
- Username: This is your full email address.
- Password: This is your SiteGround email account password, not your main password to log in to SiteGround. If you can’t remember it, you’ll have to update it by going to Websites > Site Tools > Email > Accounts > Manage Email Accounts > Actions > Change Password. Save this! You may need it again in the next section.
- POP Server: Find yours by going to Websites > Site Tools > Email > Accounts > Manage Email Accounts > Actions > Mail Configuration > Manual Settings. The Incoming Server and Outgoing Server should be the same – use that.


- Port: Change this to 995.
- The Leave a Copy… is optional depending on your preferences.
- Check the box to the left of Always Use a Secure Connection…
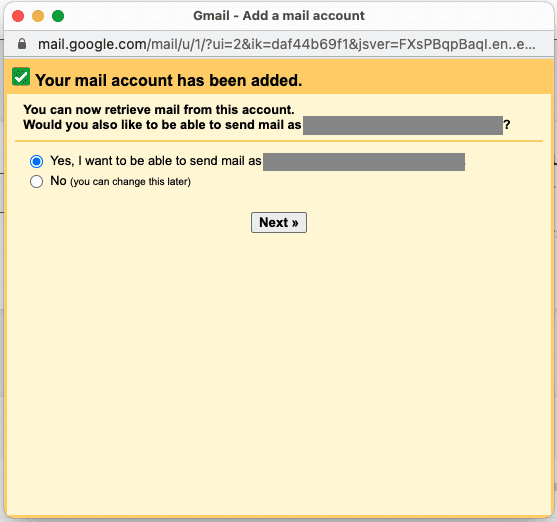
When you’re done, click Add Account. If it was successful, you should see this:
Sending Mail From Gmail As Your SiteGround Address
After you’ve configured your SiteGround email with Gmail, you have the option to send mail from your Gmail account as your domain email address. Select the Yes option if you’re interested in that and click Next.
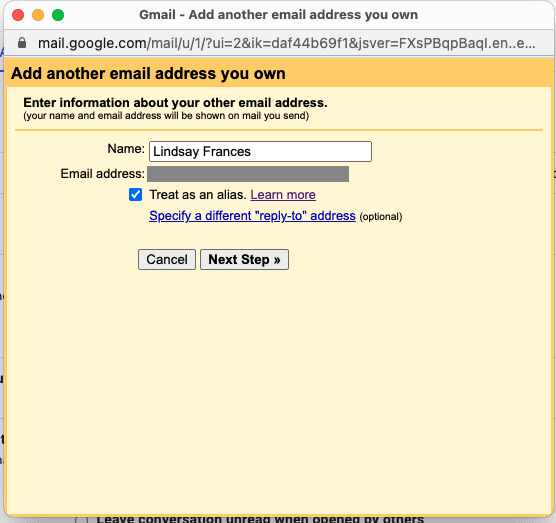
Decide if you want to treat the SiteGround address as an alias — Google has more information about that here. Click Next Step when you’re ready.
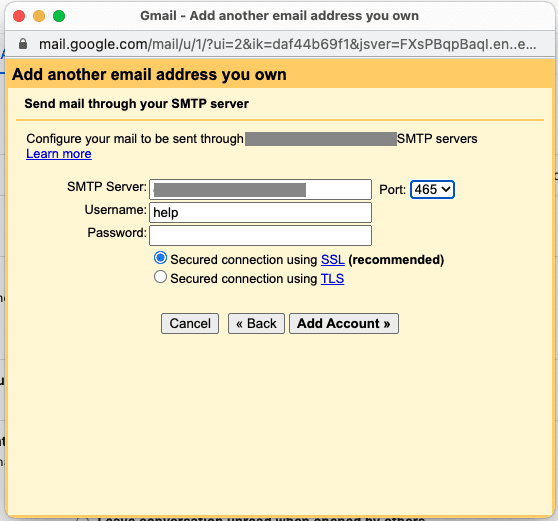
On the next page, enter the following information:
- SMTP Server: This is the same server you used when configuring Gmail. As a reminder, find it by going to Websites > Site Tools > Email > Accounts > Manage Email Accounts > Actions > Mail Configuration > Manual Settings. You want what’s listed in Incoming Server and Outgoing Server.
- Port: Change this to 465.
- Username: This is your full email address.
- Password: Use the email address password you (hopefully) saved.
- Secured Connection Using SSL: Make sure this is selected.
When you’re done, click Add Account. If you’ve set this up correctly, you’ll get a verification email from Gmail to approve.